Raised garden beds, also known as garden boxes, are perfect for growing small plots of flowers and veggies. They keep path weeds from your lawn soil, avoid soil compaction, offer good drainage and function as a barrier to pests like snails and slugs. The sides of the garden beds keep your nutrient-rich garden soil from being washed or eroded away during heavy rains.
In many areas, gardeners are able to begin planting earlier in the season simply because the soil is warmer and well drained, since it’s above ground level.
Advantages of a Raised Garden Bed
- They warm more rapidly in spring, enabling you to work the soil and plant earlier
- The soil does not get compacted in raised beds
- They drain better
- It is simple to tailor the soil for whatever you plan to grow
- You can use the materials of your choice, and they can be built with ease to your specifications
- Raised beds also minimize back strain when bending over to tend the garden
- Aside from the initial construction, less maintenance is needed than for traditional garden beds
How to Make a Raised Garden Bed
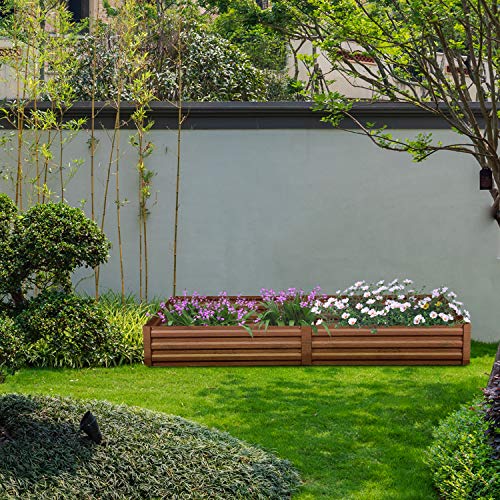
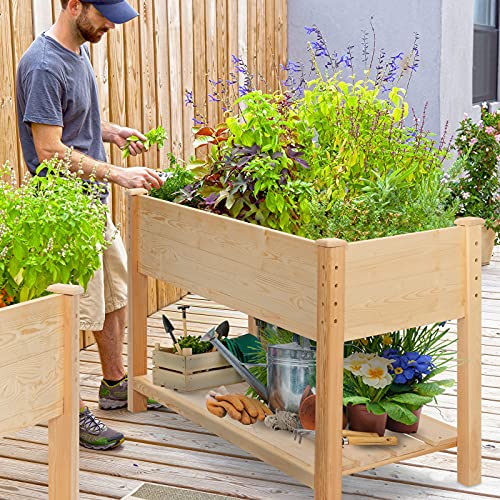 Contained raised garden beds are the most preferred type, and they are ideal for herb and vegetable gardens, as well as flower gardens. Fruits, including strawberries, blueberries, raspberries, and grapes, also do very well in a this sort of bed.
You can select from a number of materials to create your frame. Wood is a popular choice, simply because it’s simple to work with, and it’s affordable. Natural stone, concrete blocks, or brick are also good options, but there’s the extra expense and labor to consider. Some landscapers go the super-simple route, and simply place bales of straw or hay in whatever arrangement they desire, then load it with good compost and soil and then plant.
This option will only offer you a year of gardening, simply because the straw will break down, but it is worth trying if you do not mind changing the bales annually, or if you are waiting to establish a more permanent option.
Since most contained raised garden beds are manufactured from wood, here are guidelines for creating your own wood-framed raised garden bed.
Step 1 – Choose your site
 If you know that you will be growing herbs or vegetables, or sun flowers in your new backyard garden, choose a site that receives at least eight hours of sun each day. A level, flat area is vital, and you must also ensure that the area has easy access to water sources along with space for you to work.
Step 2 – Determine the shape and size of your garden
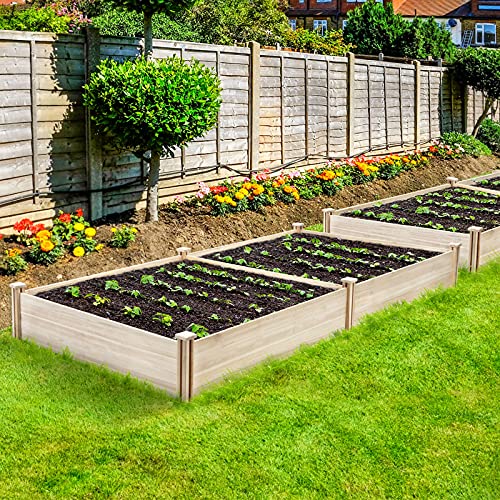
Be sure that you can access all areas of the garden without getting into the bed. Among the main benefits of a raised garden bed is that the soil does not get compressed the way it might in a traditional bed because they’re planned for accessibility. It’s wise to keep the garden to no more than four feet wide, simply because this will allow you access to the center of the raised bed from either side.
If you are putting your raised bed against a fence or wall, it needs to be no more than three feet wide. Any length you prefer will work, so long as you can manage the garden.
Regarding depth, six inches is a great start, and most vegetables grow well in a raised bed that is six inches deep. As with a lot of things, though, more is better! Ten to 12 inches would be perfect.
If you’ve decent subsoil you can merely loosen the soil with a yard fork and develop a six to eight-inch deep raised bed. If your soil is not good, or you’re intending to grow crops like parsnips or carrots that require deeper soil, your raised bed should be at least 10 inches deep.
Step 3 – Prep Your Site
As soon as you know the shape and size of your raised bed, you can get to work preparing the site. The amount of prep you’ll need to do is determined by the bed depth you are planning, along with the plants and vegetables you are intending to grow there. If you’re planning an herb or vegetable garden, a six-inch deep bed is ideal.
In order to save yourself some labor, you can use landscape fabric, newspaper or cardboard to cover the ground surface, then place your soil and plant right on top. Either way, to be sure that your plant’s roots have enough room to grow, it is wise to dig out the present sod and loosen the soil with a garden fork or shovel to a depth of 8 to 12 inches.
Step 4 – Construct the Bed
 Build your bed using weather-resistant lumber such as cedar, pressure treated pine, or the more modern composite lumbers. Boards that are 2 x 6 is ideal, as it’s simple to work with and will offer you six inches of depth. Cut your boards to the desired length, and then join them together to make a basic frame.
You can attach them in a number of ways. The easiest method is make a butt joint at every corner, pre-drilling and then screwing the corners together with galvanized screws.
Step 5 – Level Your Frame
Using a level, ensure that your frame is level in every direction. This is an essential step because if your raised bed isn’t level, you’ll have an issue where water runs off of one portion of the garden and sits in another. If your frame is uneven, just remove some of the soil underneath the high side until you have a level frame.
Step 6 – Fill Your Garden
The entire point of a bed is that it offers you the chance to garden in excellent soil. Take this chance to fill your bed with a mixture of high quality compost, topsoil, and manure. As soon as the bed is filled and raked level, you are ready to plant seeds or plants.